


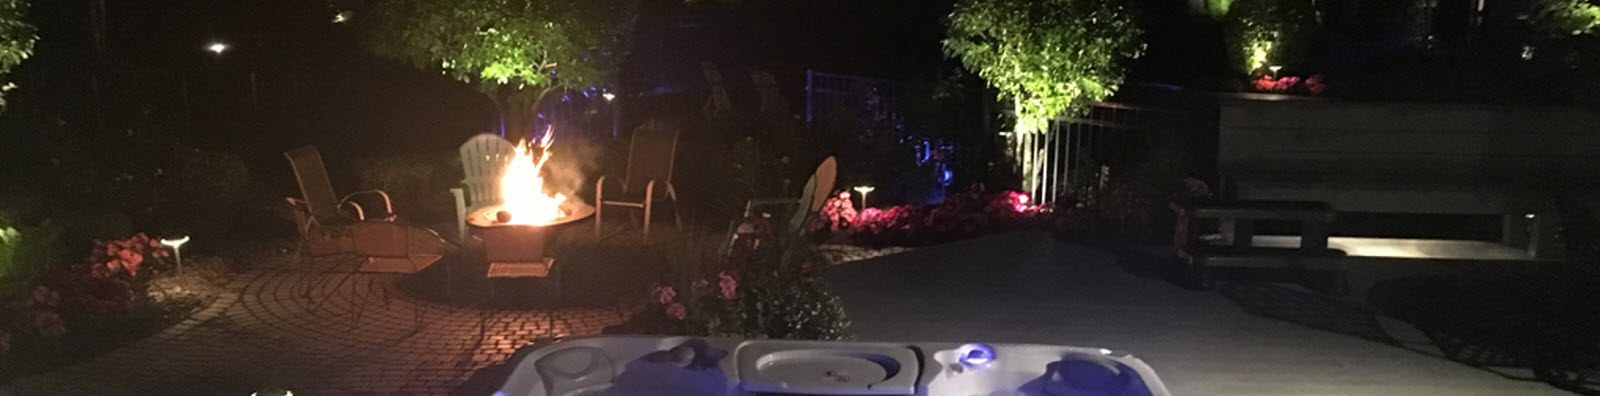

Any landscape can be enhanced by adding lighting. Whether spotlighting trees, planters, flower gardens and other features, or keeping your friends and family safe at night and creating a welcoming environment; you simply can’t go wrong with adding a little illumination! For a safe, simple install of outdoor lighting, a smart choice is to go with low voltage landscape lighting. It’s safe due to the low risk during installation because the electrical supply in your home is reduced from 120-volts to 12 volts with the help of a transformer.
Installing Low Voltage Outdoor Lighting
There are many kits to choose from in different styles, colors, sizes and finishes that can complement any home. Ideally you will want to purchase a kit that includes lights, 100’s of low-voltage cable and a transformer that will lower the current electrical flow in your home.
Step #1- Electrical Safety. Should always be top priority. You’ll need to make sure that you have a GFCI outlet where you’re planning on plugging in the transformer. This should be located outside close to where you want the lights.
Step #2- Light Assembly. Assemble the lights and place the stakes. Then insert the light bulbs, the lens and the cover. Lay the strings out but don’t attach them to the stakes just yet.
Step #3- Layout Lighting Guide. To make things easier lay the lights out where you want to install them. You don’t want to redo everything after you’ve installed them. Just leave the wire on top of the ground so you can make sure it will all fit nicely.
Step #4- Secure Transformer. When you’re happy with the placement, it’s time to secure the transformer. It needs to be mounted close to the GFCI outlet and at least one foot above the ground. You can also place it on a stake in the ground close to the GFCI outlet. It will also need to be a foot above the ground
Step #5- Cable Trenching. The next step is to dig the trench for the cable. You only need a shallow trench with this type of lighting. You don’t even need to dig a trench if you don’t want to. You can just leave but it’s at risk of damage from lawn equipment.
Step #6- Electrical Connections. The wire from the light assembly will then need to be run through the riser base. Fasten the lights to the cable. The cable has clamps with metal teeth that can pierce wiring covers to tap the electrical line. Once the lights have been tapped, strip the ends of the power cable and connect them to the terminals on the transformer. Turn the power on to see if you’ve made the right electrical connections.
Step #7- Bury Electrical Wires. Wait till it gets dark to make any adjustments and bury the cables the next day.
Step #8- Program Light Switch Timer. Now you can program the lighting by setting the timer to the hours that you want your lighting to be on and off.
Step #9- Protect Transformer. You will need to ensure that the transformer is protected from the weather and attach a plastic cover over it. This will ensure it doesn’t get wet and you’ll still be able to access it.
Step #10-Enjoy New Lighting. The last step is to enjoy your new low voltage outdoor lighting!
Creative Outdoor Lighting & More in Chagrin Falls, Kirtland, Medina, Aurora & Bedford Heights & Cleveland, Ohio
If you don’t have the physical ability, problem solving skills, or this project just sounds exhausting, and you would rather not do it yourself, then contact Advanced Irrigation Systems & Creative Outdoor Lighting to handle it all for you! Contact us for a landscape lighting consultation today!